Tuesday, January 29, 2013

The Final Curtain...

Excuse the overly dramatic post title; this is not the final anything. And at the rate I'm going, there will never be a 'final curtain' on my first dolls house project because I'm taking so long to do everything!

I had to pull myself away from all the 'fun' stuff (hats, dresses, hat boxes, pretty things), and focus on the poor abandoned shell in my spare room, gathering dust. It has no lights and I've just lifted the carpets, so it's in a bit of a sorry state at the moment.

But, I'll get there.

A few weeks ago I ordered a metre of crushed velvet online to make curtains for the boutique. On the screen it looked subtle and rich, a fawn coloured soft gold...but when it arrived I had to shield my eyes from the brassy glow it emitted.

Pah! Fooled by the sorcery of computer technology again.

But I persevered and decided to use it anyway.

It has a lovely crushed effect to the pile of the fabric, I convinced myself, in absolute denial.

And so, donning a pair of sunglasses, I set to work.

Here it is in all it's golden glory:


 I used two lengths of cardboard to make the pelmet, fabric-glued onto the velvet with the ends tucked in. 


Next, I wanted to make a piece that draped, so I cut another rectangle, glued the ends, tucked them in, and...


 Then I gathered it in the middle with a length of tiny 3mm gold ribbon.


Together with the pelmet, I was starting to get somewhere.


Next, I did the same gathered effect on some ivory cored lace, like so.


Added it to the pelmet bit...


...and tucked in the ends.


I then hemmed two lengths of fabric for the curtain parts, and gathered them at the top.


And this was my nearly finished pair of curtains.


 Here they are on the window, in close up.

 
And here is the full view:


They are up, but they need some tweaking. I think I may work on some new tie-backs and glue the pleats in place.

When its in the house, the fabric doesn't look as bad as it does on its own but I'm not sure if I am completely happy with them. I'll have a think about it for a few days, and then maybe make a change.

So I'll see you then :)


Thursday, January 24, 2013

DIY Hat Boxes - Part 2

As it turns out, making hat boxes is an addictive process!


This is my second set of hat boxes, a teal damask pattern with ivory ribbon banding and a matching rosette with pearl centre.


And here's a stack of them!


The white lace hat is making another appearance for this mini photoshoot.


I went with the same millinery brand again because didn't you know? Elizabeth Harper hats are all the rage in Paris, dahling!
 

 And now I'm off to figure out how to sort the lighting for my doll boutique!

See you soon! 
 

Wednesday, January 23, 2013

DIY Hat Boxes

 First of all, welcome to my new followers - it may seem like not a lot to somebody else, but six followers is a big deal to me. I thought I'd be alone here forever! :)


These above are my finished hat boxes which I am currently trying to sort out a video or pictures to show you the assembly process. Technology is hating me at the moment though, so it might be a while.


Designing the lid

I designed the boxes 'from scratch'; I had seen a few downloads online but they weren't the look I was going for so I decided to stop being lazy and just do it!

 Being a graphic designer by day has its uses! I've designed the template in a way that I can change up the background pattern with very little hassle, so I've great plans for a whole range of designer hat boxes.

Base design

I printed my template on heavy, linen effect board which gave a beautiful texture to the design. My mini millinery brand is 'Elizabeth Harper Millinery', a name I plucked out of the sky which works to add a realistic look to the boxes.


The ribbons were a stroke of luck in terms of being the perfect matching colour, yay!
The little bows were to cover the seam where the ribbons met.


 I designed the template to have white polka dots on a pink background inside to save me having to line the boxes. It adds a nice touch for open box displays like the one above.


I've made three hat boxes in this pattern in varying sizes for stacking. I'm imagining my boutique filled with boxes like these and the goodies to fill them!


One more picture before I go :) 

See you soon!

DIY Miniature Hat Stands

Spring can't come any sooner as far as I'm concerned. The dark evenings and shortage of daylight hours makes photographing anything a chore. Thankfully, Photoshop is my friend and I've been able to lighten my pictures so they don't look as dreary as they did to begin with.

But back to the good stuff! My original plan for my first dolls house project (the Jubilee Terrace soon to be a ladies boutique) was to fill it with an array of lovely things like hats, gowns, parasols, gloves and perfume.

And though I should be focusing on other important things like lighting the shop (more on that later this week hopefully), I can't help but want to spend my time making tiny hats and hat boxes.

I've tried ordering miniature wooden hat stands (like the one on the left) from online stores a couple of times, but they always seem to be sold out.

After a couple of failed orders, I've given in. I need lots of hat stands....so why not make them myself?


So I gathered together a collection of beads and buttons that I thought might work to re-create the look I wanted to achieve.


Next, I got some thick wire and glued it to the base (metal button) and left it to dry until stable. Truth-be-told, the kitchen whisk was sacrificed for this cause as I couldn't find wire anywhere, but it has proven most useful.


 After that I just stacked the other beads on top of the base, using superglue to keep them in place.


 And here is the almost-finished product. All it needs now is some paint.


(Some others I made earlier - of different heights and styles)


 The finished hat stand, after a couple coats of metallic gold spray paint


And here are some hats to display on them:


Until next time, toodles :)

Tuesday, January 8, 2013

Busy in the Kitchen

While I'm working on some more DIY goodies for my boutique, I decided to play around with some of the bits and pieces I received for Christmas to create a kitchen dresser scene.


These jam jars are from Maple Street and came with the cute gingham lids.


The other items are bits and pieces I have collected over the years. 


The fruit basket is from the Dolls House Emporium and has little rustic strands of straw peeking out among the fruit.


And that's it for now, see you soon :)

Sunday, January 6, 2013

DIY Cake Stand & Cakes

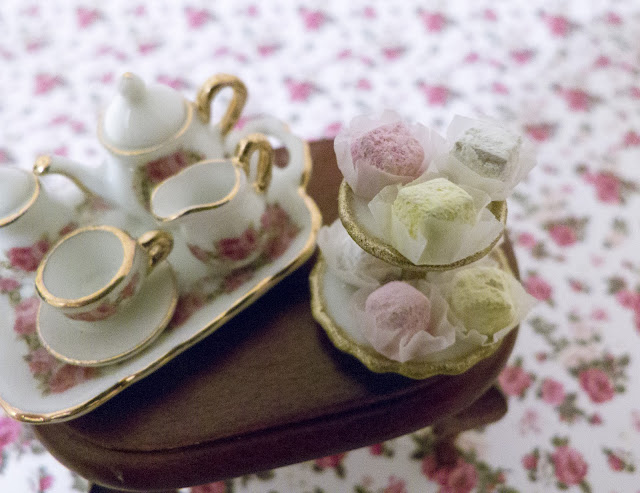
There's something about a cake stand filled with a yummy selection of desserts that is irresistible to me. It might also be the reason why I have a growing collection of tiered cake stands that are amassing at the end of my dining table in 'real life'. If only I filled them with delicious cakes as enthusiastically as I filled this miniature one!

I started with two miniature plates, purchased online as a set, and a gold link, stolen from an unfortunate necklace.

I wanted the cake stand to tie-in with the gold trimmed tea set from my previous post, so I got out the Judson's Gold Paint and set about changing the trim from pink to gold.


Finished plates:


  Then, with the aid of superglue, I attached the gold link on the bigger plate, and the smaller one on top of it, and...


Ta-dah!

 
All it needs is a few French fancies to finish it off.


I made the cakes from Fimo, which I cut into squares, baked and painted white. And, while the paint was still tacky, I rolled them in dust from chalk pastel crayons to give the 'powder sugar-dust' effect.
 
I then made little cases from circles cut from greaseproof paper which I shaped around the cakes.


And the finished look is, if I can say so myself, good enough to eat!